Cluster Terminal
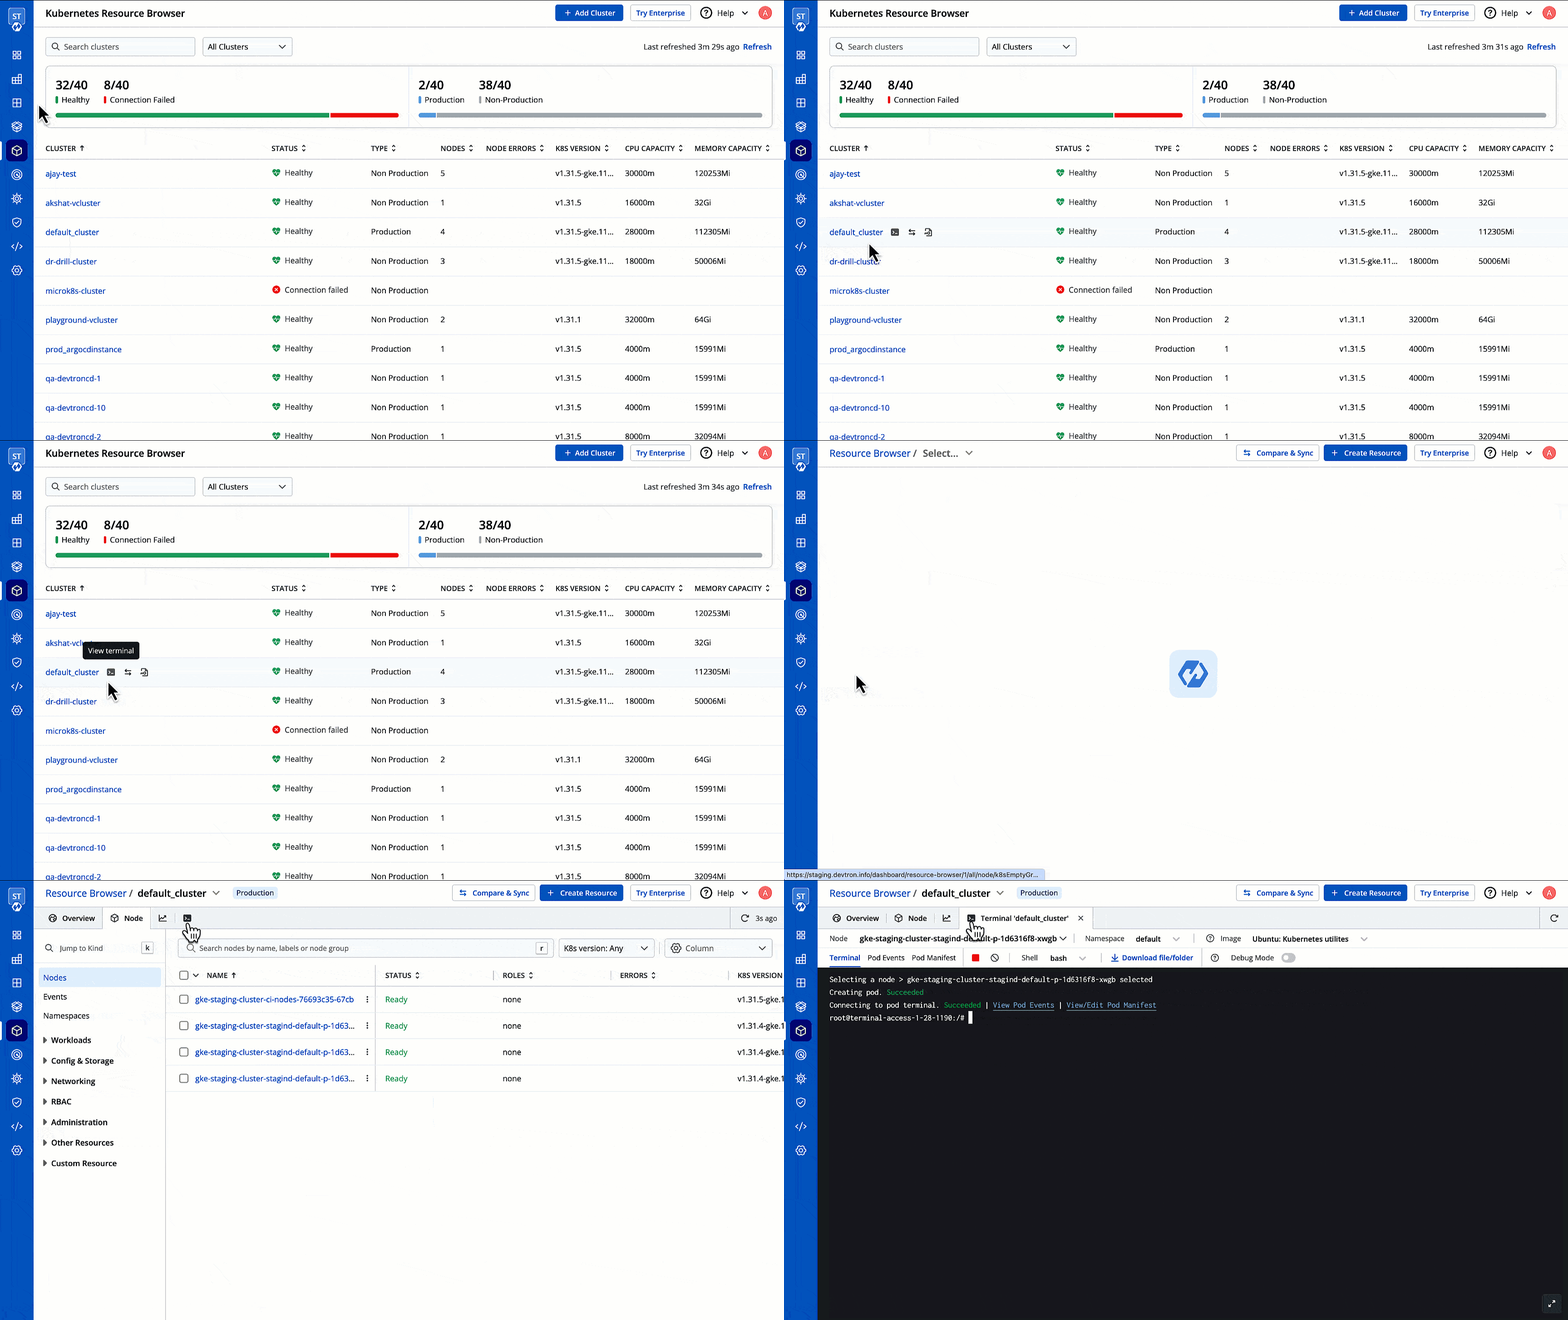
User with super-admin access can now troubleshoot cluster issues by accessing the cluster terminal from Devtron. You can select an image from the list that has all CLI utilities like kubectl, helm, netshoot etc. or can use a custom image, which is publicly available.
To troubleshoot a cluster or a specific node in a cluster, click the terminal icon on the right side.

You will see the user-defined name for the cluster in Devtron. E.g.
default-cluster.Select the node you wish to troubleshoot from the
Nodedrop-down. E.g.demo-new.Select the namespace from the drop-down list which you have added in the Environment section.
Select the image from the drop-down list which includes all CLI utilities or you can use a custom image, which is publicly available.
Select the terminal shell from the drop-down list (e.g.
sh,bash) to troubleshoot a node.
Use Case - Debugging Pods
You can also create a pod for debugging which will connect to the pod terminal. To find out why a particular pod is not running, you can check Pod Events and Pod Manifest for details.
The Auto select option automatically selects a node from a list of nodes and then creates a pod. Alternatively, you can choose a node of your choice from the same dropdown for debugging.
The Debug Mode is helpful in scenarios where you can't access your node by using an SSH connection. Enabling this feature opens an interactive shell directly on the node. This shell provides unrestricted access to the node, giving you enhanced debugging capabilities.
Check the current state of the pod and recent events with the following command:
To know more information about each of these pods and to debug a pod depending on the state of the pods, run the following command:
Here, you can see configuration information about the container(s) and pod (labels, resource requirements, etc.), as well as status information about the container(s) and pod (state, readiness, restart count, events, etc.). Click here to know more about pod lifecycle.
A container can have no shells or multiple shells running in it. If you are unable to create a successful connection, try changing the shell, as the container may not have that shell running.
Last updated